|
Getting your Trinity Audio player ready...
|
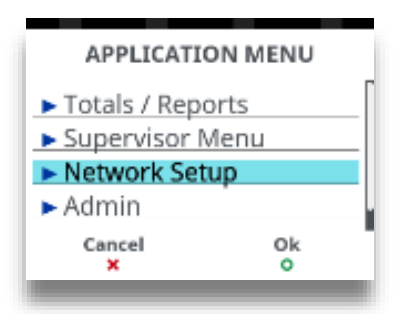
Press MENU until the ‘Application Menu’ is displayed.
1. Select ‘Network Setup’ in the menu and then press TICK.
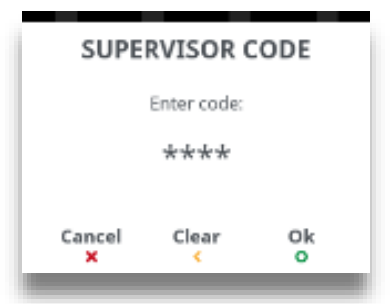
2. Enter your ‘Supervisor Code’ and then press TICK. Use CLEAR or X to correct mistakes.
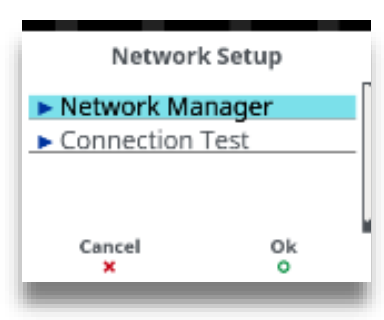
3. Select ‘Network Manager’ and then press TICK.
4. Choose one of the following options from the screen below:
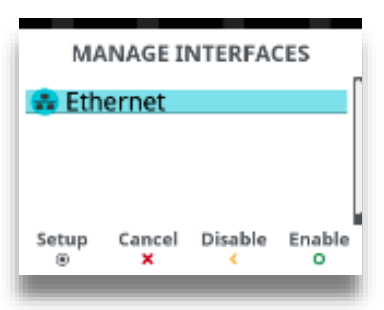
Press MENU to enter ‘Setup Mode’ for the selected interface.
Press X to exit the function.
Press CLEAR to disable the interface.
Press TICK to enable the interface.
You may now configure your network settings.
Ethernet
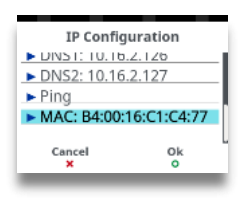
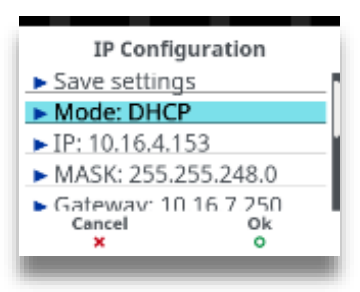
Selecting ‘Ethernet’ from the ‘Manage Interfaces’ menu will display the ‘IP Configuration Menu’:
IP Configuration Menu Note: The following options are only applicable if the terminal is in ‘Static Mode’, they will have no effect on the terminal if it is configured in ‘DHCP Mode’. You should only change this data on instruction from the helpdesk.
1. Use the ▲▼ keys to select the required select an option.
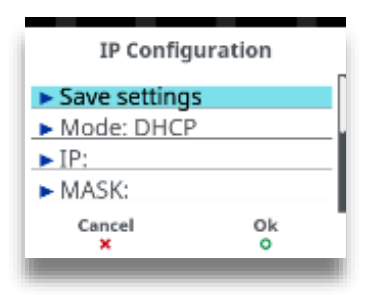
2. Use the ▲▼ keys to select the required option then press to enter edit mode.
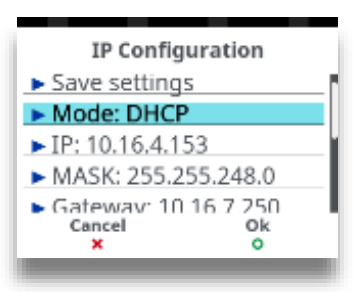
Save Settings
1. Select ‘Save settings’ on the screen to save the changes.
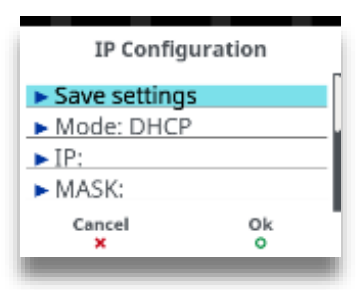
The settings will be saved.
Mode
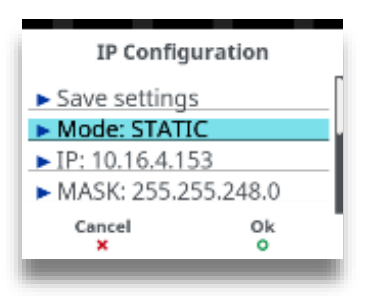
You may configure the terminal to use DHCP or Static IP addresses. The initial screen will display which mode you are in.
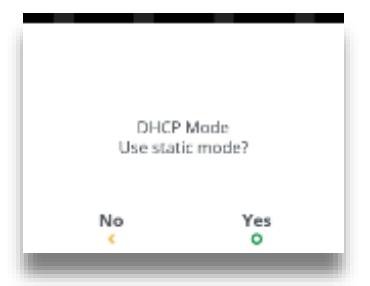
1. The terminal will display the current mode. Select the screen to open the window.
2. Press TICK to change to Static Mode. Press CLEAR to return to previous screen.
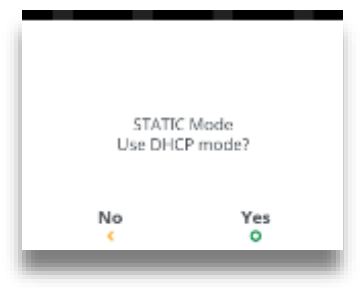
3. Press TICK to change to DHCP Mode. Press CLEAR return to previous screen.
4. Press X to exit function.
IP
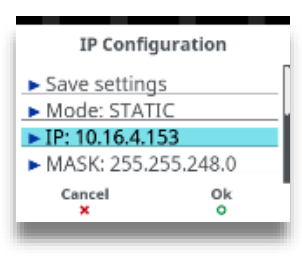
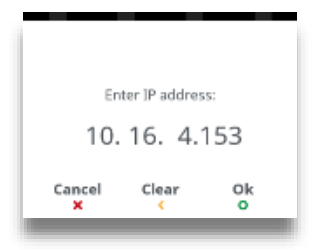
You may configure the IP address. The initial screen will display which IP address you are connected to.
Press X to clear all digits.
Press CLEAR to clear one digit at a time.
Press X to confirm data.
1. The terminal will display the current mode. Select the screen to open the window.
2. Press TICK to confirm address or clear the digits and re-enter new address.
Mask
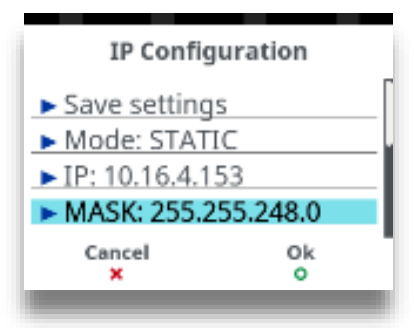
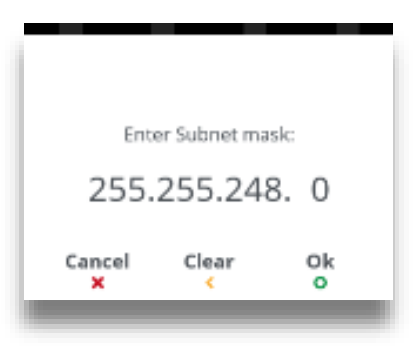
You may configure the Mask address. The initial screen will display which Mask address you are configured with.
1. Select screen to select ‘Mask’ or press TICK to select highlighted option.
2. Press TICK to confirm address or clear the digits and re-enter new address.
Gateway
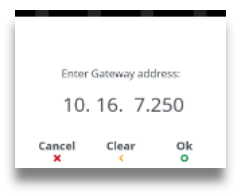
You may configure the Gateway address. The initial screen will display which Gateway address you are connected to.
1. Select screen to select ‘Gateway’ or press TICK to select highlighted option.
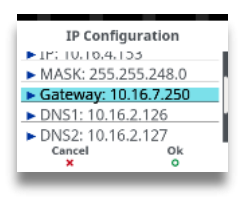
2. Press TICK to confirm address or clear the digits and reenter new address.
DNS1
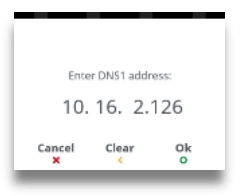
You may configure the DNS1 address. The initial screen will display which DNS1 address you are connected to.
1. Select screen to select ‘DNS1’ or press TICK to select highlighted option.
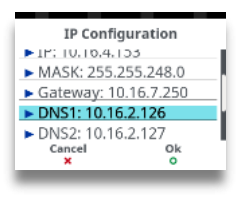
2. Press TICK to confirm address or clear the digits and re-enter new address.
DNS2
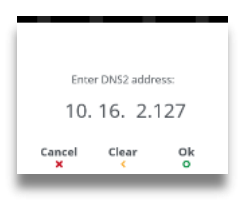
You may configure the DNS2 address. The initial screen will display which DNS2 address you are connected to.
1. Select screen to select ‘DNS2’ or press TICK to select highlighted option.
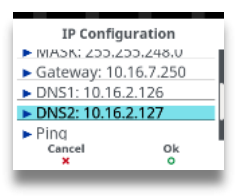
2. Press TICK to confirm address or clear the digits and re-enter new address.
PING
It is possible for the terminal to ping an IP address.
1. Select screen to select ‘Ping’ or press TICK to select highlighted option.
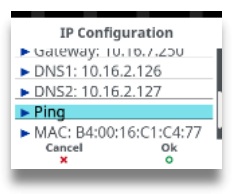
2. Press TICK to ping the address or clear the digits and re-enter new address to ping.
MAC
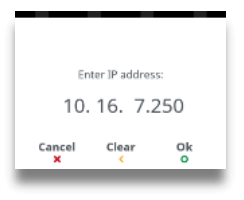
The screen will display the MAC address of the terminal.
